Chủ Nhật, 31 tháng 5, 2015

Jiggle-Free June Monthly Workout Challenge

Be The First To Comment
Jiggle Free June Monthly Workout Challenge


Moday June 1
5 Jumping Jacks
5 Squat Jumps
5 Lunge Jumps

Tuesday June 2
5 Burpees
5 Plank Jacks
5 Seconds Jump Rope

Wednesday June 3
10 Jumping Jacks
10 Squat Jumps
10 Lunge Jumps

Thursday June 4
10 Burpees
10 Plank Jacks
10 Seconds Jump Rope

Friday June 5
15 Jumping Jacks
15 Squat Jumps
15 Lunge Jumps

Saturday June 6
15 Burpees
15 Plank Jacks
15 Seconds Jump Rope

Sunday June 7
20 Jumping Jacks
20 Squat Jumps
20 Lunge Jumps

Moday June 8
20 Burpees
20 Plank Jacks
20 Seconds Jump Rope

Tuesday June 9
25 Jumping Jacks
25 Squat Jumps
25 Lunge Jumps

Wednesday June 10
25 Burpees
25 Plank Jacks
25 Seconds Jump Rope

Thursday June 11
30 Jumping Jacks
30 Squat Jumps
30 Lunge Jumps

Friday June 12
30 Burpees
30 Plank Jacks
30 Seconds Jump Rope

Saturday June 13
35 Jumping Jacks
35 Squat Jumps
35 Lunge Jumps

Sunday June 14
35 Burpees
35 Plank Jacks
35 Seconds Jump Rope

Moday June 15
40 Jumping Jacks
40 Squat Jumps
40 Lunge Jumps

Tuesday June 16
40 Burpees
40 Plank Jacks
40 Seconds Jump Rope

Wednesday June 17
45 Jumping Jacks
45 Squat Jumps
45 Lunge Jumps

Thursday June 18
45 Burpees
45 Plank Jacks
45 Seconds Jump Rope

Friday June 19
50 Jumping Jacks
50 Squat Jumps
50 Lunge Jumps

Saturday June 20
50 Burpees
50 Plank Jacks
50 Seconds Jump Rope

Sunday June 21
55 Jumping Jacks
55 Squat Jumps
55 Lunge Jumps

Moday June 22
55 Burpees
55 Plank Jacks
55 Seconds Jump Rope

Tuesday June 23
60 Jumping Jacks
60 Squat Jumps
60 Lunge Jumps

Wednesday June 24
60 Burpees
60 Plank Jacks
60 Seconds Jump Rope

Thursday June 25
65 Jumping Jacks
65 Squat Jumps
65 Lunge Jumps

Friday June 26
65 Burpees
65 Plank Jacks
65 Seconds Jump Rope

Saturday June 27
70 Jumping Jacks
70 Squat Jumps
70 Lunge Jumps

Sunday June 28
70 Burpees
70 Plank Jacks
70 Seconds Jump Rope

Moday June 29
75 Jumping Jacks
75 Squat Jumps
75 Lunge Jumps

Tuesday June 30
75 Burpees
75 Plank Jacks
75 Seconds Jump Rope

Directions
Jumping Jacks
391eb093d0047a2a97a788da4ee7f195
  • Stand with your feet a few inches apart and your arms at your sides, then simultaneously raise your arms out to the sides and over your head, and jump your feet out so they are slightly more than shoulder-width apart.
  • Without pausing, quickly reverse the movement.
  • Repeat.
Squat Jumps
391eb093d0047a2a97a788da4ee7f195
  • Stand with your feet shoulder-width apart, arms hanging at your sides.
  • Squat down until your knees are bent about 90 degrees.
  • Immediately swing your arms overhead and jump upward as high as you can.
  • As you land, gently bend your knees and sink back down into the squat position. That's 1 rep.
Lunge Jumps
391eb093d0047a2a97a788da4ee7f195
  • Stand with your feet together, elbows bent 90 degrees.
  • Lunge forward with your right foot.
  • Jump straight up as you thrust your arms forward, elbows still bent.
  • Switch legs in midair, like a scissor and land in a lunge with your left leg forward.
  • Repeat, switching legs again. 
Burpees
391eb093d0047a2a97a788da4ee7f195
  • Stand with your feet hip width apart and your arms down by your side
  • Lower into a squat position with your hands flat on the floor in front of you
  • Kick your legs backwards into a press up position and lower your chest to the floor
  • Push your chest back up to the press up position thrust both feet forward so you are back in the squat position
  • Jump up and raise both hands over your head 
Plank Jacks
391eb093d0047a2a97a788da4ee7f195
  • Begin in plank position, with your shoulders over your wrists, your body in one straight line, and your feet together.
  • Like the motion of a jumping jack, jump your legs wide and then back together. Jump as quickly as you want, but keep your pelvis steady and don’t let your booty rise toward the ceiling.
Jumping Rope
391eb093d0047a2a97a788da4ee7f195
  • First, turn the rope using your wrists. Keep the shoulders and elbows “quiet.”
  • Next, jump over the rope with a very low, relaxed bounce.
  • Your mantra is “turn first and jump second.”

Thứ Bảy, 30 tháng 5, 2015

When I Lost Weight, I Lost My Sanity

Be The First To Comment
When I lost weight, I lost my sanity.

I know what you are thinking.

"What?"

Back in 2010, I lost almost 45lbs in 9 months. Most of you already know that. I was unhappy with how I looked and how I felt, and I strived to improve my body image. 

I wasn't always that way, though. I was athletic for most of my life, but eventually I quit sports and got a part time job while in high school. When I started nursing school, my eating habits became even worse. I did not go to a gym, I did not workout, and I did not eat clean. I was hooked on Burger King cheeseburgers, soda, and Chik-fil-a. Most the weight that I gained was in my face, butt, hips, thighs, and arms.


Eventually, I knew I was setting myself up for a lifetime of failure and heading down a road of continued weight gain and chronic diseases so I decided to make a change. I threw out all of my junk food and began actually cooking for myself-something that I had never done in my whole entire life! I stayed away from most carbs, simple sugars, fried foods, and fast foods and began calorie counting. I also began walking daily for extended periods of time (thank you, nursing career!). I barely sat down!

The weight finally began to shift after a couple of months. It was really amazing to be able to experience my body changing in ways that I never thought possible. With every ten pounds lost, I decided to reward myself. I remember I went jean shopping one time and got a belly piericing to celebrate another. It made me feel really good!


As time went on and I kept losing the pounds, I began noticing a change within myself. Sure, I got happier.. but as time went on, I actually became more fickle about every little thing I put into my mouth. I spent more time reading labels at grocery stores than actually shopping. I debated on everything to eat. I remember that year, my co-workers at the clinic I worked at threw me a birthday party and I was so hesitant to eat the birthday cake they had gotten me because I didn't want to "ruin" my body. Eventually, my weight got to 105 lbs, which was the limit based on my height, but I wanted lower. I was obsessed with seeing that number go down. 

One day, I woke up and had a huge realization: I was obsessed. I was losing my sanity. All because I was taking this "healthy" thing too far. Guys, it IS possible to take "healthy" too far, I promise. 

I got so skinny that when I look at the photos below, sometimes I cannot even believe that this was me!


The guy whom I was married to at the time was a terrible influence on me and kept telling me that I actually looked better as a thinner person. But now when I see it, I know that I didn't. Being thin does NOT make you beautiful. These days, being strong is the best feeling that I could ever have.

When it starts interfering with your life and your happiness, it is time to reconsider things. I decided I did not want to live my whole life calorie counting and not eating certain things so I decided to take my sanity back by practicing moderation. It paid off! I did gain some weight back naturally (I am 120lbs on a regular day), but it's now lean muscle and I love eating a good cheeseburger and having a beer once a week. I don't stress things anymore!


My point? Don't take it out of proportion. It is great to take necessary strides to becoming the best and healthiest version of yourself, but remember that too much of a good thing can still be just as bad. Don't get so caught up in the high that you forget what you are doing.

Oh, and my current husband loves me with a little more curves. Real men won't make you lose yourself to make themselves happier with you. :)

Are YOU ready for a healthier and stronger NEW YOU? Join the Fit Mommy challenge and try the Diary of a Fit Mommy workout bundle which includes all three 4 week workouts programs (arms, abs, butt) PLUS an easy to follow 4 week clean eating program. These are my EXACT programs and diet that I have used to get back into shape over the last two years!


Buy now

Thứ Năm, 28 tháng 5, 2015

7 Day Jiggle Free Arms Weekly Workout Challenge

Be The First To Comment
The third week in May is here and it is time to get those arms strong and ready for summer!

7 Day Jiggle-Free Arms Weekly Workout Challenge


Day 1
5 Arm Circles
5 Chair Dips
5 Walking Planks
5 second Basic Plank
5 Burpees

Day 2
10 Arm Circles
10 Chair Dips
10 Walking Planks
10 second Basic Plank
10 Burpees

Day 3
15 Arm Circles
15 Chair Dips
15 Walking Planks
15 second Basic Plank
15 Burpees

Day 4
20 Arm Circles
20 Chair Dips
20 Walking Planks
20 second Basic Plank
20 Burpees

Day 5 
25 Arm Circles
25 Chair Dips
25 Walking Planks
25 second Basic Plank
25 Burpees

Day 6
30 Arm Circles
30 Chair Dips
30 Walking Planks
30 second Basic Plank
30 Burpees

Day 7
35 Arm Circles
35 Chair Dips
35 Walking Planks
35 second Basic Plank
35 Burpees

Directions:
Arm Circles
  • Stand with your feet shoulder width apart and lift both arms straight out to your sides at shoulder height.
  • Move your arms in a circular pattern, 4-6 inches in diameter with your palms facing down, drawing a small circle with your fingertips. Continue for one minute.
  • Let your arms relax for a few seconds, then raise them again, this time drawing the shape in the opposite direction for one minute.
  • For an added challenge repeat the motion for one minute in each direction, this time with your palms facing upwards.
Chair Dips
  • Position your hands shoulder-width apart on a secured bench or stable chair. Slide your butt off the front of the bench with your legs extended out in front of you.
  • Straighten your arms, keeping a little bend in your elbows to keep tension on your triceps and off your elbow joints.
  • Slowly bend your elbows to lower your body toward the floor until your elbows are at about a 90-degree angle. Be sure to keep your back close to the bench.
  • Once you reach the bottom of the movement, press down into the bench to straighten your elbows, returning to the starting position. This completes one rep.
  • Keep your shoulders down as you lower and raise your body. You can bend your legs to modify this exercise.
Walking Planks
  • Start in plank position.
  • Move your right hand into standard push up position, then move your left hand into standard push up position.
  • Return to the starting position by lowering onto your right forearm and then your left forearm.
  • Alternate sides, rising onto your left hand next, then your right.
Basic Plank
  • Start off on a yoga mat in the pushup position. Starting with the pushup position is the easiest way to get into the plank.
  • Lower both your forearms to the ground so that both your elbows and fists are flat to the ground. Your palms should be balled up, and directly underneath your shoulders.
  • Curl your toes under and engage your abs by tilting your pelvis and pulling your belly button toward your spine.
  • Straighten your body but keep your neck and spine neutral. Imagine that you’re a plank of wood, and that you’re straight as an arrow.
  • Flex your abdominals and squeeze your glutes. These are the two major muscle groups you’ll be working out in this exercise.
  • Hold this position, also known as the plank, until after the burning begins. Keep your eyes on the floor in front of you. Avoid raising your behind. Your body should make a straight line from your heels to the back of your head.
Burpees
  • Begin in a standing position. Your feet should be shoulder-width apart. Now, lower your body into a squatting position, placing your hands on the floor in front of you.
  • Kick your feet back so that you are in push-up position. Keep your hands firmly on the ground to support your body.
  • Lower your chest to do a push-up. Bring your chest back up.
  • Kick your feet back to their original position. Stand up, and then jump into the air while clapping your arms overhead.
  • Repeat.

Shape Magazine Feature!

Be The First To Comment
Hey guys, I hope you all are having an awesome week! I am so excited to announce that my Facebook page has just hit 20,000 likes. I remembered the day I started it-I never thought that I would accumulate so many likes. Thank you guys so much for the love and support!

Also, I shared with some of you yesterday that I was featured on Shape.com. Shape has been one of my all time favorite fitness magazines, so I just wanted to share it with you all! The topic is "How I Lost the Post-Pregnancy Weight" in which ten mothers share their best tips!

Click here to view it!

Thứ Tư, 27 tháng 5, 2015

THE BIGGEST LOSER PANCAKES

Be The First To Comment

Biggest loser oatmeal & egg white pancakes. They say once you try these, you will never go back. tastes like French toast!
Ingredients:
6 egg whites
1 cup rolled oats, dry
1 cup cottage cheese
2 teaspoons sugar
1 teaspoon cinnamon
1 teaspoon vanilla
Instructions:
In a blender, blend all ingredients until smooth. Heat a griddle or large non-stick skillet over medium-low heat. Spray with non-stick cooking spray. For each pancake pour 1/4 cup of batter onto griddle. Flip when they start to bubble. Cook until golden brown. Repeat with remaining batches, spraying the griddle as needed. Makes about 10 pancakes.


3 Ingredient Strawbery Frozen Yogurt

Be The First To Comment
Are you wanting a delicious summer treat that won't pack on the pounds? I have absolutely enjoyed the simplicity of making my own frozen yogurt from home using a blender and just three ingredients. The best part of all? You can use any fruit you want! It does not have to be strawberries.

3 Ingredient Strawbery Frozen Yogurt

Ingredients:

2 cups plain Greek yogurt
1 cup frozen strawberry slices (or fruit of your choice)
1/4 cup honey
Directions

In a blender, combine yogurt, strawberries, and honey.
Blend for 3 minutes or until completely smooth and there are no chunks of strawberry left.
Store in an air-tight container and set out at least 5 minutes before eating to soften up. (or place back into the blender-preferred)


Thứ Ba, 26 tháng 5, 2015

3 Things to Do Before Baby Arrives! (WALGREENS)

Be The First To Comment

3 Things to Do Before Baby Arrives!

Once baby arrives, cleaning your house will be the last thing on your mind. Honestly, you might not even get around to cleaning your house for a few weeks-if you are lucky!

You will be so busy enjoying your new bundle of joy that you probably won't give household chores a second thought. When the nesting stage hits around your due date, make sure to take advantage of it and get to cleaning! This also includes decluttering your home from things that are old, worn, or have been unused for the past year. 

During your nesting stage or perhaps a few weeks before, aim to make freezer crockpot meals. I started when I was 7 months pregnant and made around 15 meals and froze them to be thrown into the crockpot for later. Once my son was born, all we had to do was thaw a bag the night before, throw it in the crockpot, and eat!

I specifically loved making smoothie packs for breakfast. All you have to do is throw the ingredients in a zip lock bag and freeze.


2. Make sure you have all of the baby essentials. 

Before baby arrives is the time to make a checklist of all of the baby essentials you'll need for the arrival because once baby comes, you may not be able to think clearly.

There are some baby items that are great and helpful to have, but then there are some that are a total must have and that you shouldn't postpone getting.

My go-to baby essentials are: 
  • diapers, ointment, and wipes
  • formula (if needed)
  • breast pump
  • onesies
  • hats, socks, and mittens 
  • a nursing pillow
  • baby wash and baby detergent
  • swaddling blankets
  • spit up rags
  • crib with mattress
  • car seat and stroller
  • pacifiers
  • sleepsacks
The thing that I loved the most and that I am so happy to have had on hand after giving birth was a baby sleepsack. These things are so easy to put on and easy to take off. They are also super comfortable for sleep!


After baby arrives, you will be able to reevaluate and see what you and your baby truly will need.

3. Perhaps the most important of all-make sure that you and your immediate family members get up to date on your immunizations! 

Before I dedicated my life to health and fitness, I once worked as a nurse in a pediatric clinic. I gave immunizations on a daily basis! One of the most important shots given was the TDAP vaccine, which is also known as the Pertussis or whooping cough vaccine. 

Pertussis or the whooping cough is highly contagious and can be life threatening for infants and young children. It makes you cough so severely that it is almost impossible to eat, sleep, or even breathe. Some even get cracked ribs due to the coughing! 

According to the CDC, approximately half of infants less than 1 year of age who get pertussis are hospitalized and, worldwide, there are an estimated 16 million cases of pertussis and about 195,000 deaths per year. Since the 1980s, there has been an increase in the number of reported cases of pertussis in the US. Scary, isn't it?


Perhaps, the scariest thing about it all is that adults who have not had the TDAP vaccine are the ones who can transfer this illness to infants and small children. 

This is why pre-teens are not the only ones who need this vaccine-adults do as well!

I remember when I was pregnant with my son, I was asked specifically if I had taken the TDAP vaccine before and I had since I worked in healthcare. 


If you are pregnant, it is best to seek the vaccine during the 3rd trimester of your pregnancy to pass the protection on to your baby.  If you are planning to have your family over to help out with the new baby, I encourage you to talk to them about the vaccine-for your baby's safety. Yup, that even means the grandparents of the baby!

Walgreens is doing a great campaign right now with the United Nations Foundation in which Walgreens will donate a lifesaving vaccine to a child in need around the world. It is fast and easy-you don't even need an appointment to be seen. Just come on in whenever the pharmacy is open and they will set you right on up! As far as insurance, most shots are covered, including by Medicare. 

If you have any questions, feel free to visit the
Get a Shot. Give a Shot.® homepage for more details on how you can keep your family safe while helping other families in need.

Disclaimer: Donation currently valid for non-flu vaccinations. Aggregate donation of up to $1 million. Vaccines subject to availability. State-, age- and health-related restrictions may apply.

7 Day Muffin Top Weekly Workout Challenge

Be The First To Comment

Day One
10 Reverse Crunches
10 Russian Twists
10 Side Jackknives
10 Side Planks
10 Bicycle Crunches

Day Two
15 Reverse Crunches
15 Russian Twists
15 Side Jackknives
15 Side Planks
15 Bicycle Crunches

Day Three
20 Reverse Crunches
20 Russian Twists
20 Side Jackknives
20 Side Planks
20 Bicycle Crunches

Day Four
25 Reverse Crunches
25 Russian Twists
25 Side Jackknives
25 Side Planks
25 Bicycle Crunches

Day Five
30 Reverse Crunches
30 Russian Twists
30 Side Jackknives
30 Side Planks
30 Bicycle Crunches

Day Six
35 Reverse Crunches
35 Russian Twists
35 Side Jackknives
35 Side Planks
35 Bicycle Crunches

Day Seven
40 Reverse Crunches
40 Russian Twists
40 Side Jackknives
40 Side Planks
40 Bicycle Crunches

Directions:
Reverse Crunches
  1. Lie down on the floor with your legs fully extended and arms to the side of your torso with the palms on the floor.
  2. Move your legs up so that your thighs are perpendicular to the floor and feet are together and parallel to the floor.
  3. Move your legs towards the torso as you roll your pelvis backwards and you raise your hips off the floor.
  4. Hold the contraction for a second and move your legs back to the starting position while exhaling.
  5. Repeat.
Russian Twists
  1. Sit on the ground with your knees bent and your heels about a foot from your butt.
  2. Lean slightly back without rounding your spine at all. It is really important, and difficult, to keep your back straight, but don’t let it curve.
  3. Place your arms straight out in front of you with your hands one on top of the other. Your hands should be level with the bottom of your ribcage.
  4. Pull your navel to your spine and twist slowly to the left. The movement is not large and comes from the ribs rotating, not from your arms swinging. Inhale through center and rotate to the right. This completes one rep.
Side Jackknife
  1. Lie on your left side on an exercise mat with your legs extended straight downward and the right leg on top of the left. Place your left hand on your abdominals. Place your right hand behind your head. This is your starting position.
  2. Raise your right let straight in the air while simultaneously raising your torso, bringing your right elbow toward your right leg.
  3.  Hold for a moment and then return to the starting position.
  4. Repeat for a complete set and then switch sides.
Side Plank
  1. Lie on your left side with your knees straight.
  2. Prop your upper body up on your left elbow and forearm. Position your elbow under your shoulder.
  3. Brace your core by contracting your abs forcefully as if you were about to be punched in the gut.
  4. Raise your hips until your body forms a straight line from your ankles to your shoulders. Your head should stay in line with your body.
  5. Hold this position for the prescribed amount of time while breathing deeply. That’s one set.
  6. Turn around so that you’re lying on your right side and repeat.
Bicycle Crunches
  1. Lie flat on the floor with your lower back pressed to the ground and contract your core muscles.
  2. With your hands gently holding your head, lift your knees to about a 45-degree angle.
  3. Slowly, at first, go through a bicycle pedal motion.
  4. Alternately touching your elbows to the opposite knees as you twist back and forth.
Come get your abs back after having a baby with this workout plan by clicking the image below:
URLSmall

Thứ Hai, 25 tháng 5, 2015

5 Traits of a Toxic Friend

Be The First To Comment
Toxic relationships happen all the time. It can be a relationship, friendship, a marriage, or even family. These toxic people can negatively impact our lives, some can even hurt us down to the core. This is why it is super important to choose wisely whom we give our time to. 

If we find ourselves in a toxic relationship or friendship, it is time to break up and to cut ties.

For example, recently, my ex-husband's on & off "girlfriend" contacted me out of the blue on Facebook because she wanted to hear my story about our time together and why we divorced. I told her and she agreed that he had treated her terribly as well and that his family was crazy, etc. She said how she was "so happy" to be away from them. As time went on, I realized she and I had quite a few things in common and we became friends.

Then, as time went on, she started only contacting me when she wanted to talk about herself. There wasn't really a "Hey, how are YOU doing?" in there anywhere. And when she would contact me, it was so negative and only talking about the things she hated. And eventually, she got back in contact with my ex-husband and his family because she was "lonely" aka weak. So what did I do? I kicked her out. Cut her off. Nada-zip-zilch-bye bye.

I admit, I was a little unearthed. I let this chick into my home and introduced her to my son and husband and let her around my son. I trusted her and I thought she was sincere, but it turned out to be a lie. I figured from all the shit she told me about how badly she was treated, she might have learned something. Not apparently. My marriage to my ex-husband was the exact same way. She really reminded me of him, so maybe they should be together. After all, misery loves company, why not be miserable together? 

But. Instead of letting the anger consume me, I used this as a very important learning tool in what to look for in a good friend... and what to avoid in a bad friend.


Many of us choose to stay in relationships and friendships that are terrible for us for a variety of reasons such as we are:

  • comfortable
  • lonely
  • lacking self respect or self love
  • easily manipulated
  • naive
  • a people pleaser
  • and so on...
But what you must realize is that nobody deserve that kind of treatment and I mean nobody. If you allow them to, people will use and abuse you. Been there, had that happen. 

So, here are 5 traits of a toxic friend, dating partner, spouse, and family member:


  1. Selfish: This is a biggie. Do they always call you or text you to talk about themselves? Are they always self centered? Do they really care how YOU feel? Also, are they unavailable when you need them, but expect you to be there for them? If so, then you have a very selfish friend. Friendships and relationships are about giving to each other and helping one another. Not seeing how much you can take or suck out of someone.
  2. Negative: Sometimes, it seems like a negative nancy has nothing good to say. They complain a lot and the bads always seem to outweigh the goods. On the other hand, when things are going well, things are never good enough. 
  3. Bad Influence: Toxic friends, spouses, and family can be a bad influence on how you live your life and the way you think and view your own life. If you are constantly around selfish, negative, inconsiderate, and unsupportive people, then guess what? You will become selfish, negative, inconsiderate, and unsupportive to those around you. Will Smith once said, "Look at your 5 closest friends. Those 5 friends are who YOU are. If you do not like who you are, then you know what you must do." You are whom you associate with. Choose wisely.
  4. Inconsiderate: A toxic friend does not consider your feelings or desires because their feelings and desires come first (see selfish). They are the kinds who don't really take much into consideration. Such as going behind your back and telling someone whom they know you are not friends with something about you. I honestly call this carelessness. Obviously, they don't give a shit.
  5. Unsupportive: Lastly, the toxic friend is unsupportive. They expect YOU to support them, but when it comes to something you are going through or need help with, they disappear faster than a snowman in the month of July. (Again, see selfish)
As you can see, these are the top 5 main traits of a toxic friend, dating partner, spouse, or even a family member. I want you to know that you do NOT have to put up with this garbage-I don't care who they are. Stand up for yourself and if you find yourself in this situation then get out as fast as you can. There are wonderful people out there who deserve your time and attention, but someone with these traits are not one of them.

Chủ Nhật, 24 tháng 5, 2015

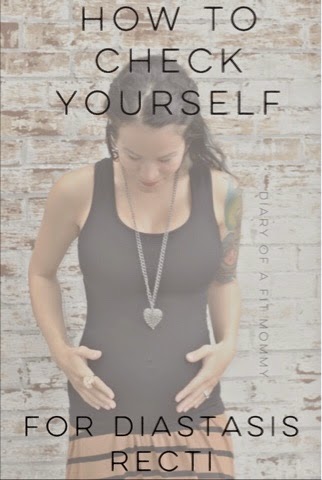
How to Check Yourself for Diastasis Recti

Be The First To Comment


A lot of you mommies out there inbox me from time to time with questions regarding abdominal separation after pregnancy. This separation, also known as Diastasis Recti or DA, is a medical issue that must be addressed depending on the level of severity. 

How to Check Yourself for Diastasis Recti:
  1. Lie on the floor on your back with your knees bent, and the bottoms of your feet flat on the floor. (You may use a yoga mat if you have a hardwood floor)
  2. Place one hand on your abdomen with the tips of your fingers across your belly button.
  3. Next, press your fingertips into your abdomen, along the "imaginary line" that separates the two halves of your abdominal muscles. (make sure your tummy is relaxed and not flexed)
  4. Now, you are going to perform a crunch movement, curling your upper body towards your knees (make sure your back is flat on the ground).
  5. Move the tips of your fingers along the separation line and feel for any gaps in between the two halves of your abdominal muscles.
  6. *If you experience a gap in between your abdominal muscles of 2 to 2 1/2 finger widths, then you have Diastasis Recti. Anything under two finger widths is usually considered mild and should heal on its own.

If you find yourself with a larger degree of DA, you should refrain from most exercises-especially ones targeted at the abdomen as these moves can make the level of DA worse. 

When in doubt, always speak to your doctor and get a proper examination.


            © 2015 Pregnancy Handbooks - Designed by Mukund | ToS | Privacy Policy | Sitemap

            Hide
            X